Let me talk about why there is a small tool called pbi-utils. When I make sample files for presentations every day, I have to start Power BI Desktop again every time. I wonder if I can make a template like a PPT template, and then focus more on the content itself? For a period of time, I have actually used this method. I have saved a sample template, so it is ok to save another copy every time.
Until one day I was going to make an example about Power BI row-level security (RLS for short), and found that there was no way to adapt to different business models by saving the template in this way.
So I started to think about whether this kind of RLS can be abstracted, and at the same time, it can have templates, preferably page permissions, and one-click generation. This is the original idea of pbi-utils, but currently you can use Tabular Editor to manipulate the data model in the face of Power BI, but you can't control the new page and so on. This is the matter and shelved it.
Until one day I saw a tool called pbi-tools on sqlbi, pbi-tools can completely disassemble the pbix file Model (model) and report (report), which can be secondary development. So there is a small tool called pbi-utils.
Special thanks to @mthierba (author of pbi-tools).
Some functions of pbi-tools are used in pbi-utils. If you are interested in more functions, go to the home page of pbi-tools. This is a very good tool.
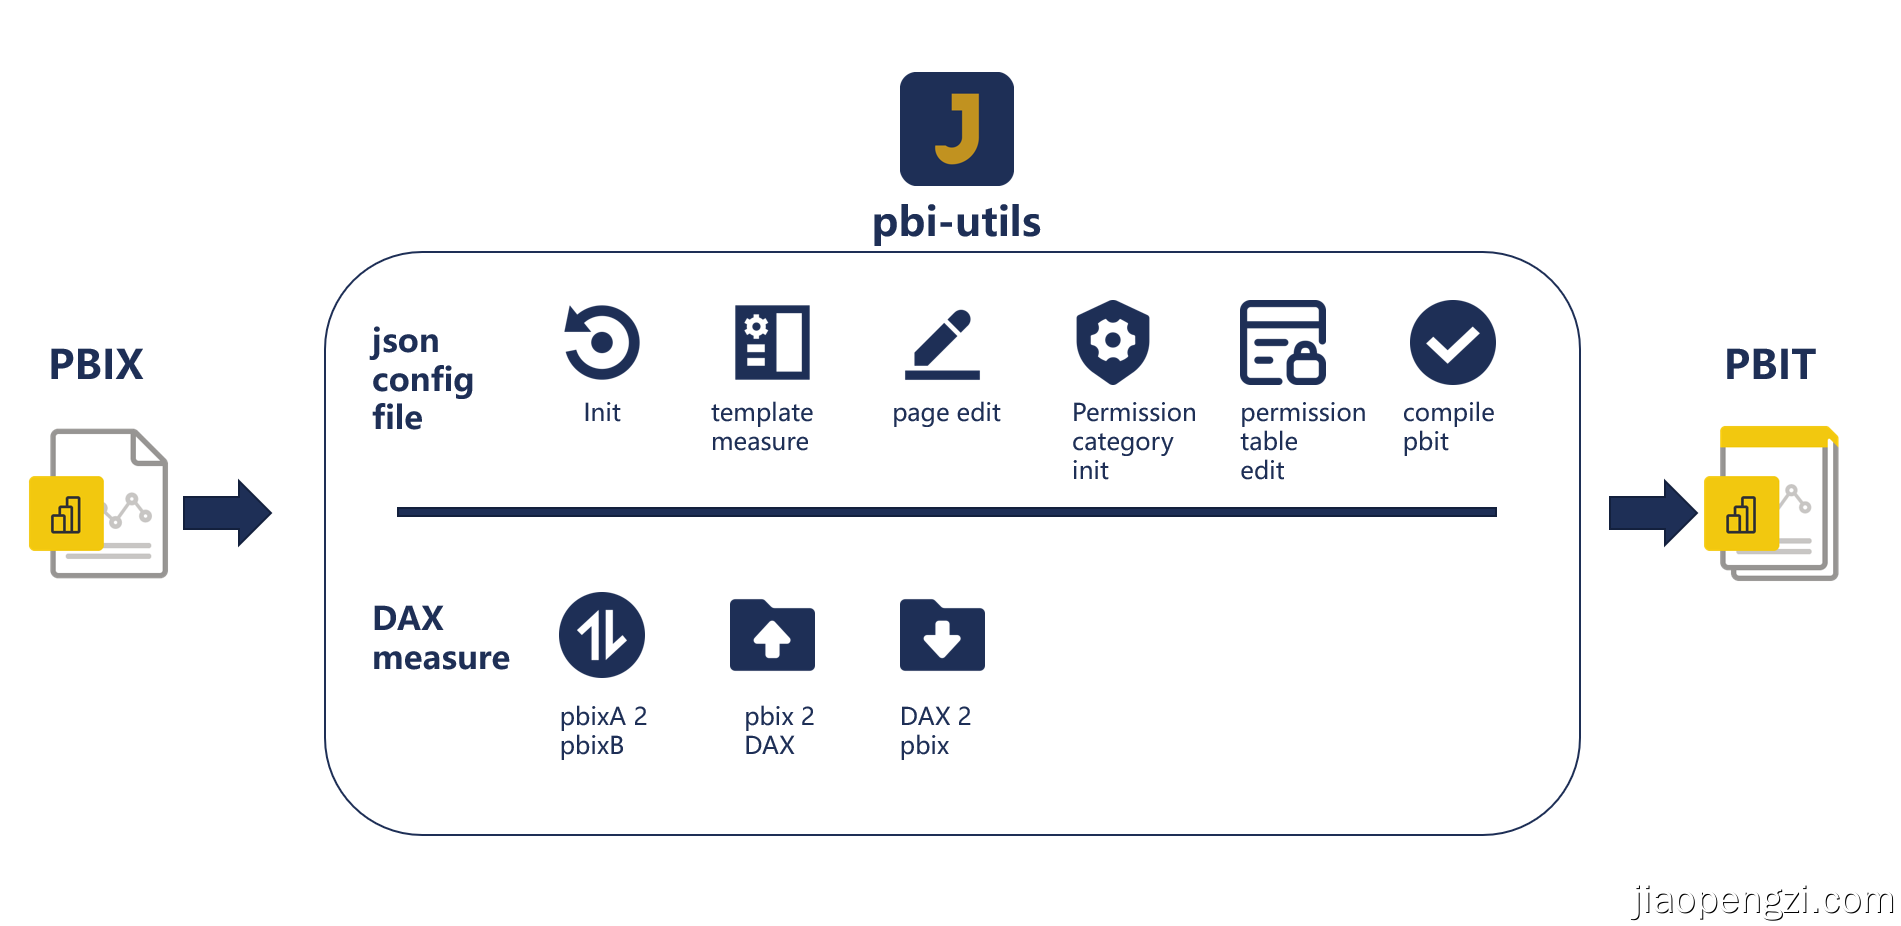
The overall framework of pbi-utils is as follows:
- Download address-github: https://github.com/jiaopengzi/pbi-utils/releases
- Download address-gitee: https://gitee.com/jiaopengzi/pbi-utils/releases
- pbi-utils-portable-xxxxzip is portable, after decompressing the zip file, find pbi-utils.exe to use it.
- pbi-utils-setup-xxxxexe installation file, double click to install it.
- The supported pbix files need to be Power BI Desktop version: October 2022+, operating system: win10+.
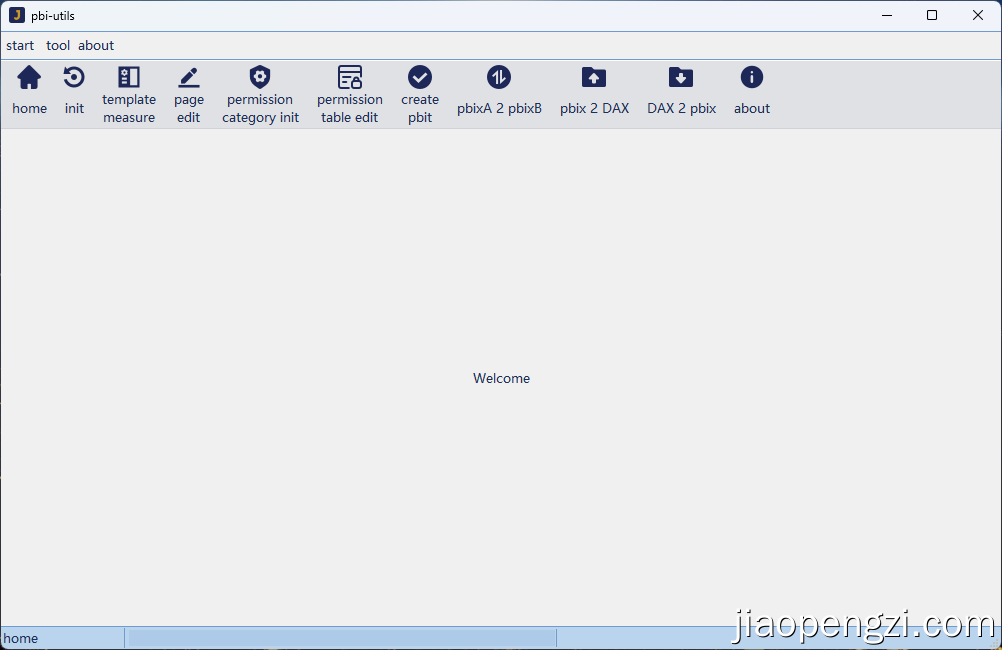
Home interface
Before doing the documentation, let's talk about my basic ideas. It is relatively simple to say, that is, through a separate json configuration file, some configurations we need are decoupled separately. I can complete the Power BI adjustment needs by manipulating the configuration file.
Let me first explain that what we usually get is business data, and we can add pbi-utils to create a basic report model shell.
Still use the demo data shared with you before ( https://jiaopengzi.com/1435.html )
What we get is a pbix file that only imports business data and has no report page.
First we need to initialize the json configuration file for our pbix file.
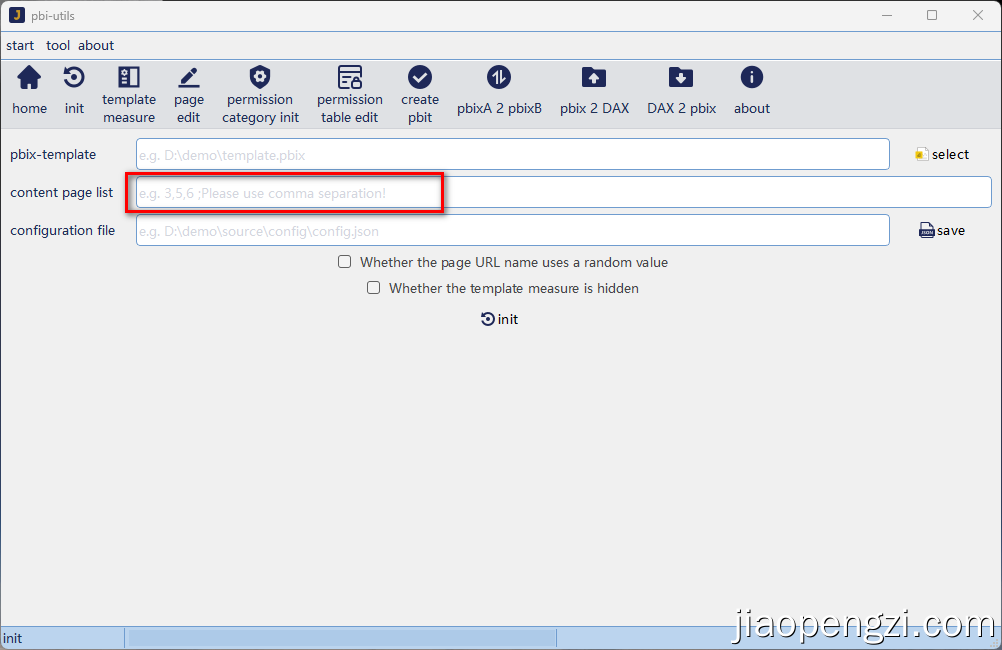
Rules for the number of pages of content: it can only be an integer from 1 to 99. If multiple secondary classifications are required, use commas to separate them; other content cannot be entered.
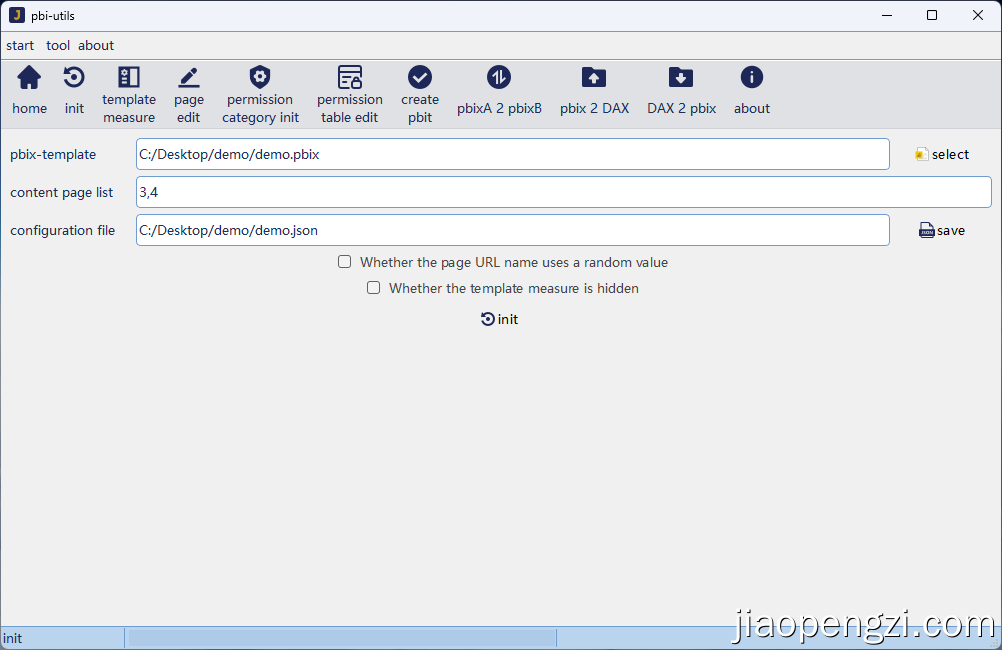
As shown in the figure below, we think that C:/desktop/demo/demo.pbixis a business template, and the number of content pages: 3,4 means that we need page navigation for two secondary categories. At the same time, the number of content pages for the first category is 3 pages, and the number of content pages for the second category for 4 pages.
Of course, there is also a page URL name whether to use random values. This purpose is actually prepared for fake page permissions. We will introduce it in the video.
After clicking initialization, we can get our json configuration fileC:/desktop/demo/demo.json
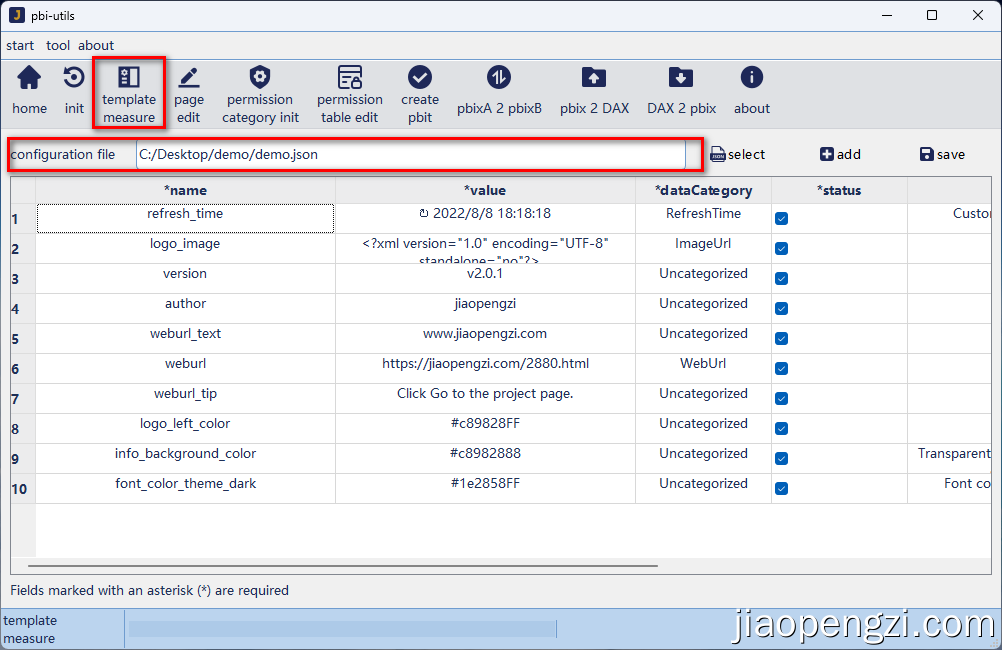
Select the previously initialized C:/desktop/demo/demo.jsonfile under Template Metrics to see the template metrics.
- I made templates for some of my commonly used template metrics for everyone. Of course, these can be customized. When you save each time, the template measurement value you saved will be used as the template for the next initialization. So you can increase or decrease according to your needs.
- If there is a metric value in our previous pbix template, please do not have the same name as the metric value here.
- We have added a report refresh time . If it is enabled and unchecked, it will be displayed according to the automatic refresh time, and if it is checked, it will be displayed according to the assigned content.
- Image URL Compatible image URL link and SVG format.
- You can delete, edit and enter multiple lines by right-clicking; use
|split , and use newline for multiple lines. - Remember to save after modification.
Select the previously initialized file under page editing C:/desktop/demo/demo.jsonto see the page configuration file.
The properties of the page here are to use my template for everyone. When using it, as long as it is saved, it will use its own template when it is initialized later, which is very humane.
Page editing does not add or delete, so it needs to be considered clearly when we plan the report, and the number and classification of pages can only be confirmed through initialization.
- ordinal: Page sorting starts at 0.
- urlName: The name of the page, as used in the URL in the Power BI service.
- displayName: The display name of the Power BI page.
- displayOption: 1、Page view:1=>Fit to page, 2=>Fit to width, 3=>Actual size.
- height: Page height.
- width: Page width.
- verticalAlignment: Vertical alignment:'Middle'=>Middle, 'Top'=>Top.Note that single quotes need to be preserved.
- visibility: Hide page:0=>show, 1=>hide.
- pageTitleText: page title.
- pageTitleTextColor: Page title text color, using decimal color, plus transparency, with two 00s at the end indicating full transparency and FF being completely opaque.
- pageTitleBackgroundColor: Page title background color, same format as above.
- navigationButtonName: The navigation button name (selection View in the show pane).
- navigationButtonDisplayName: The name of the navigation button page is displayed.
- navigationButtonTextColorYes: Navigation button text color - permissioned, format as above.
- navigationButtonTextColorNo: Navigation button text color - no permission, same format as above.
- navigationButtonBackgroundColorYes: Navigation button background color - with permission, the format is the same as above.
- navigationButtonBackgroundColorNo: Navigation button background color - no permission, same format as above.
- navigationButtonTooltipYes: Navigation button mouse on the tooltip - there are permissions.
- navigationButtonTooltipNo: Navigation button mouse on the tooltip - no permission.
- note: note
Home
└─Navigation
	├─NoPermission
	├─A00
  	│  ├─A01
  	│  ├─A02
  	│  ├─...
  	│  └─A99
  	├─B00
  	│  ├─B01
  	│  ├─B02
  	│  ├─...
  	│  └─B99
  	├─...
  	└─Z00
		├─Z01
      	├─Z02
      	├─...
      	└─Z99
- Home: Home page, suggested name remains unchanged
- Navigation: the general navigation page, navigate to the second-level navigation page, namely: A00-Z00, A to Z represent categories, theoretically there are 26 categories, numbers are represented by two zeros, if there is only one category on the content page, there is only one category by default Navigation A navigation page.
- Content pages: A01...A99, B01...B99 ... Z01...Z99; categories are represented by letters, content pages range from 01 to 99, theoretically each category can have 99 pages, plus categories can Get 26 * 100 = 2600 content pages, which can basically meet the various levels of navigation needs of Power BI. Of course, after initialization, these names can be customized according to business needs.
- NoPermission: No permission prompt page, the page that jumps when the user has no permission.
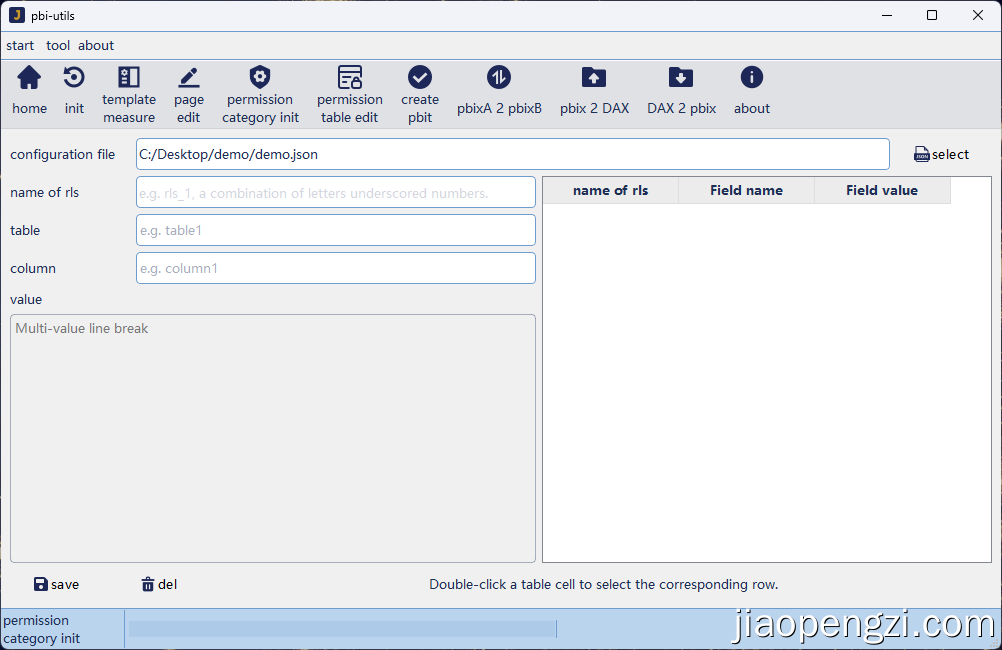
Authorization category initialization is mainly for RLS. If there is no RLS requirement, the current setting can be skipped.
On the permission category initialization page, select the previously initialized C:/desktop/demo/demo.jsonfile to see the permission category initialization page.
Currently there is no RLS configuration, if necessary, fill in and save according to the following configuration.
-
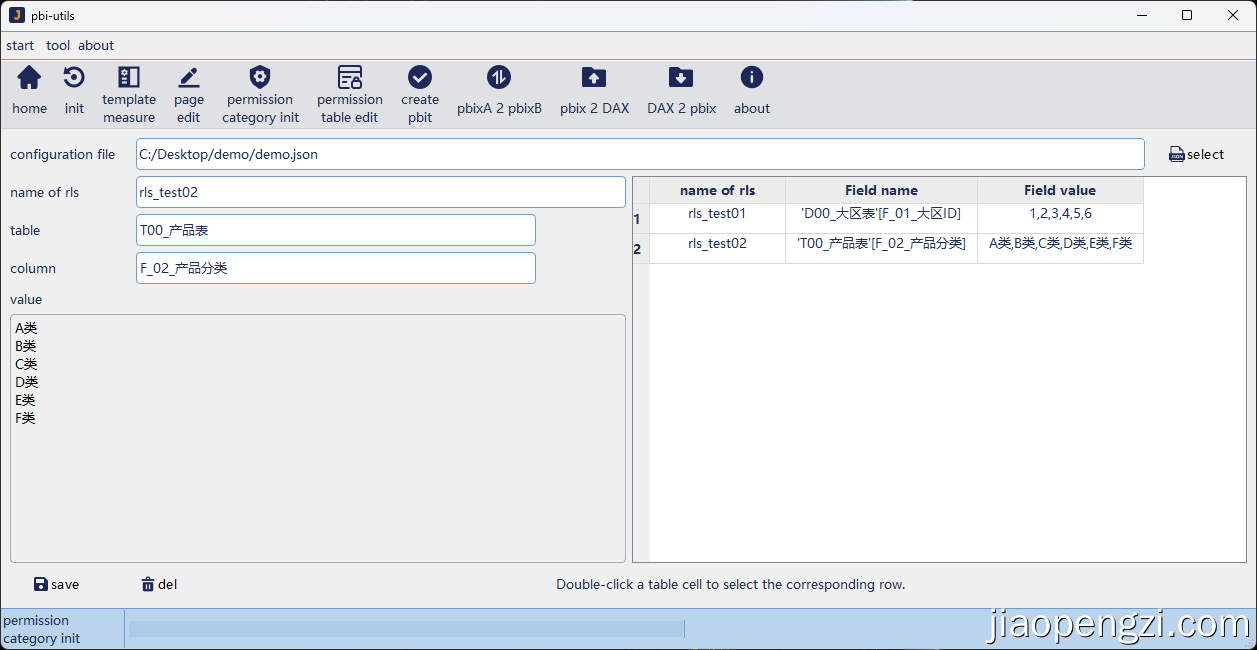
name of rls: the metric name of the rls rule you need to add, the combination of letters, underscores and numbers is invalid, and cannot be the same name as the original metric in pbix.
-
table: The table will obtain the name of the corresponding table through our previous initialization.
-
column: When the form is updated, the corresponding field of the form can be obtained.
-
Field value: The field value is all the values of the current field , the purpose is to reserve after the category is initialized.
-
Add RLS rules
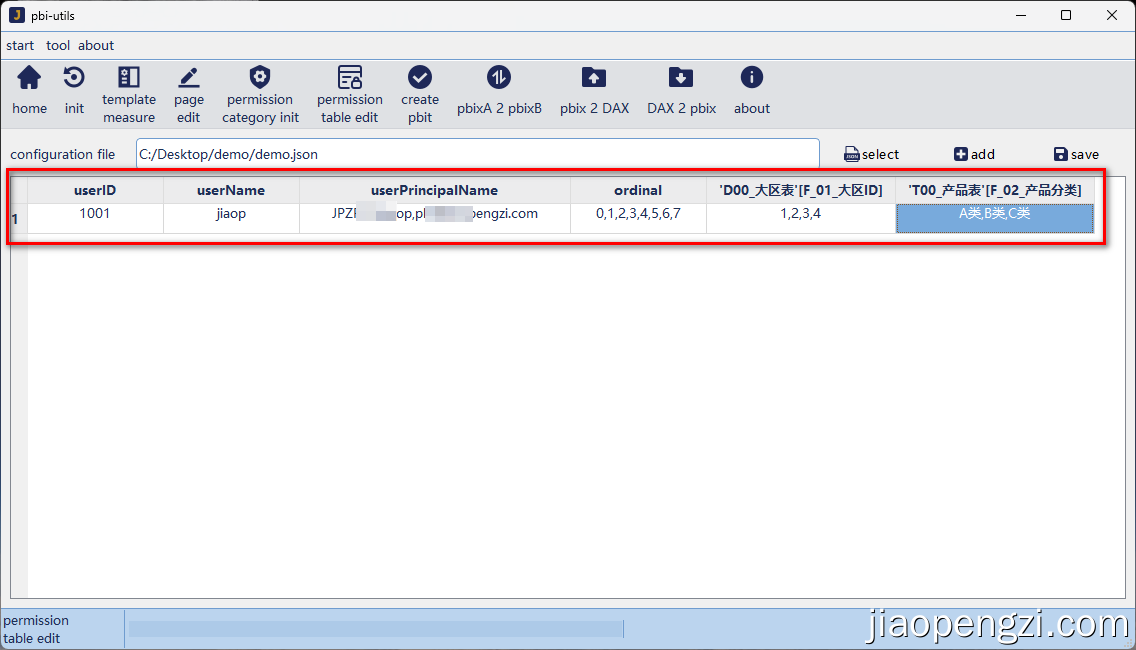
On the permission table editing page, select the previously initialized C:/desktop/demo/demo.jsonfile to see the permission table editing page.
-
By default, a corresponding local user permission will be generated according to the account of the computer where the user is located.
-
Permissions include page ordinal and RLS permission, and RLS permission is the data we initialized using permission category earlier.
-
A user name will have a normal Power BI account, and the corresponding account name is also required on this machine to support local user permissions.
-
edit via right click
-
Add one Power BI account;
-
Page permissions reserved: 1, 2, 3, 4, 5, 6, 7;
-
Region ID reserved: 1, 2, 3, 4;
-
Product category reserved: A, B, C.
-
Of course, you can also add more account configurations through the Add button, remember to save.
After compiling and generating the pbit page, at this point, basically our configuration is done, and the page we need can be generated.
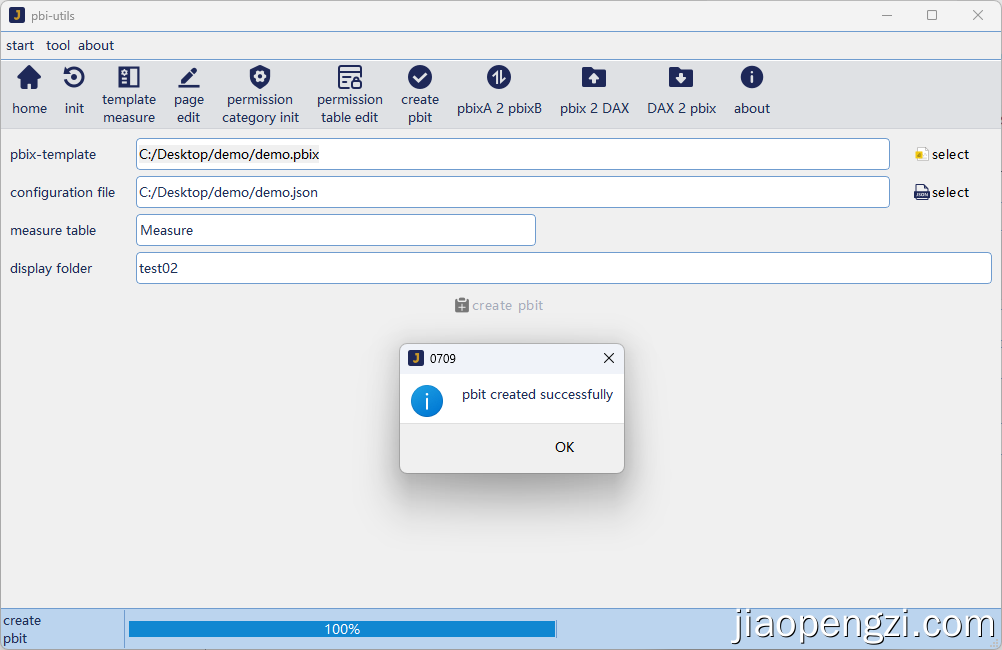
- Choose our pbix template.
- Select the configuration file we have configured
C:/desktop/demo/demo.json. - Select the table that needs to store the measures.
- It is recommended to use a combination of letters, underlines and numbers to store the metrics of our navigation and necessary elements.
Click create pbit button, and you will see a prompt that the pbit is created successfully after a while.
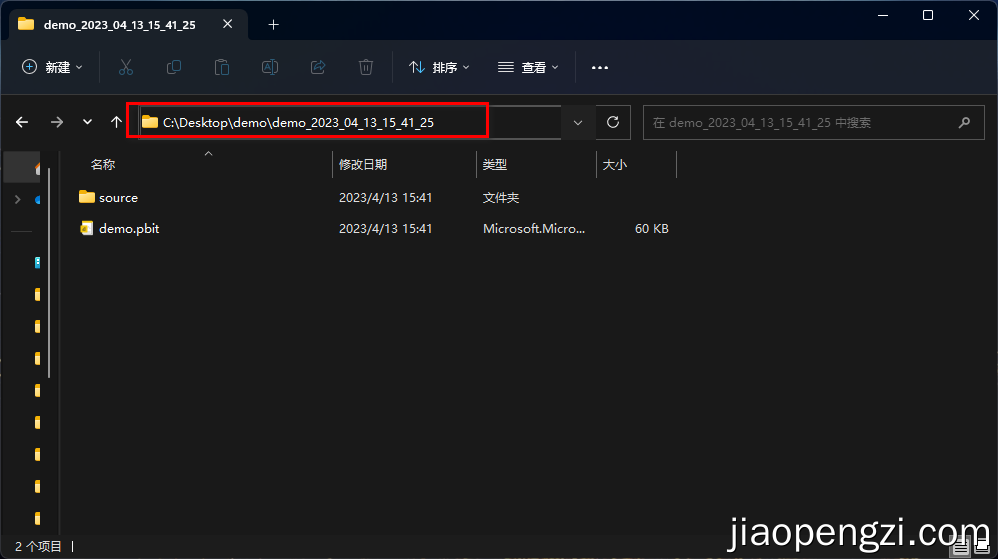
A pbix name keyword folder will be created in the same directory as our pbix file.
Open the pbit file in the folder and confirm the loading. You can see that our page has changed from a blank page at the beginning to a page that meets our configuration and has been successfully created.
Note the 5 changes in the marked numbers:
- The display name and page number and hierarchical structure in the page editor.
- Measures in Template Measures
- The navigation metrics automatically written in the background of the pbi-utils tool, and the folder test02 is written by ourselves during compilation.
- Metrics under the rls folder, the rls name we initialized in the permission class.
- Auxiliary tables automatically written by the background of the pbi-utils tool.
At the same time, pay attention to RLS, in Modeling=>View as=>you can see that we have an additional rls role. We pull a matrix of dimensions related to the RLS permissions in our configuration file.
When we click OK, we can find that it is consistent with the RLS we configured.
Also includes page permissions, etc. please watch our demo video.
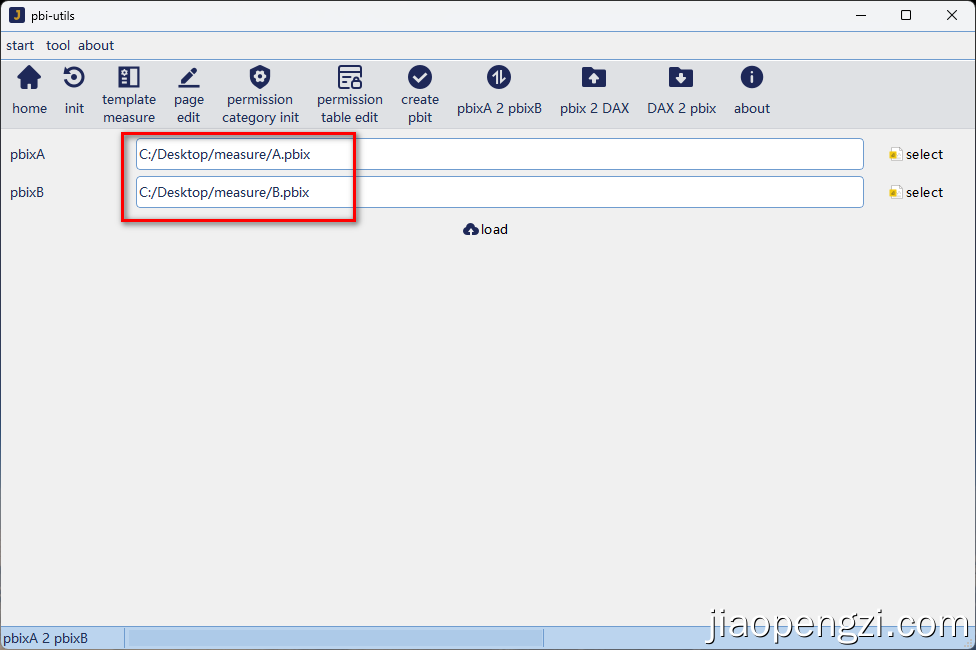
In the pbixA 2 pbixB page, the 2 here means to.
We saved the previous pbit file as A.pbix, and created a new B.pbix file without any measurement value.
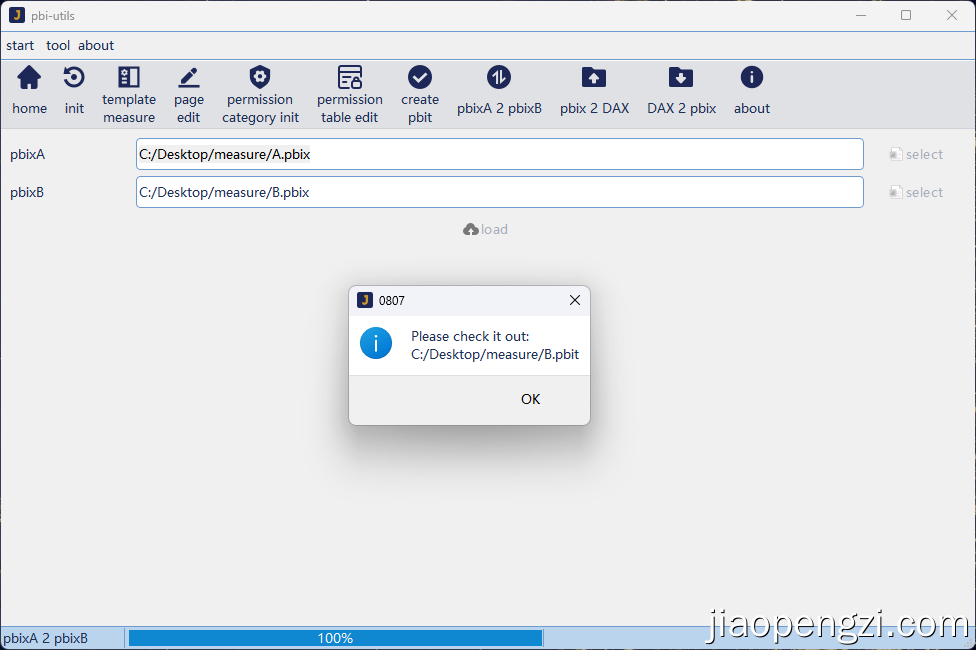
Select the corresponding A.pbix and B.pbix, click load.
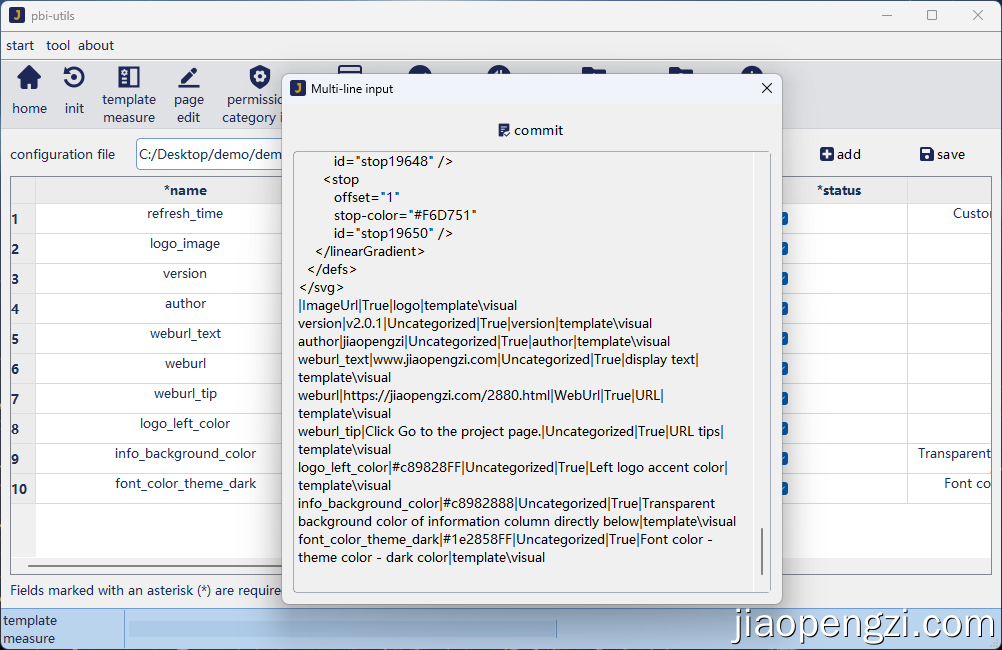
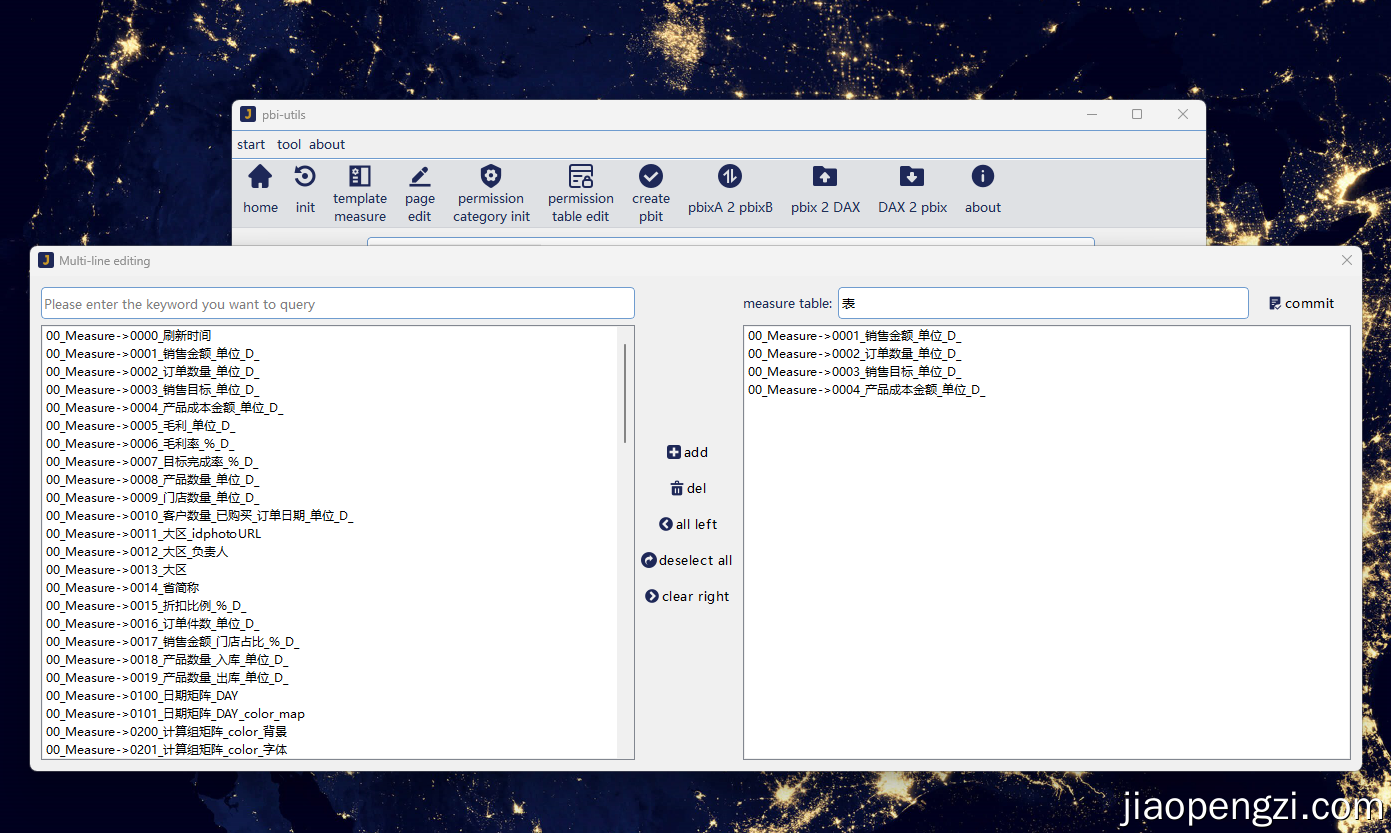
After waiting for a while, you can see a pop-up window for multi-line editing. Here we select the measurement value that needs to be imported into B.pbix, select the measurement value table, and click commit.
You can see the prompt, in the same directory as B.pbix, a B.pbit file is generated.
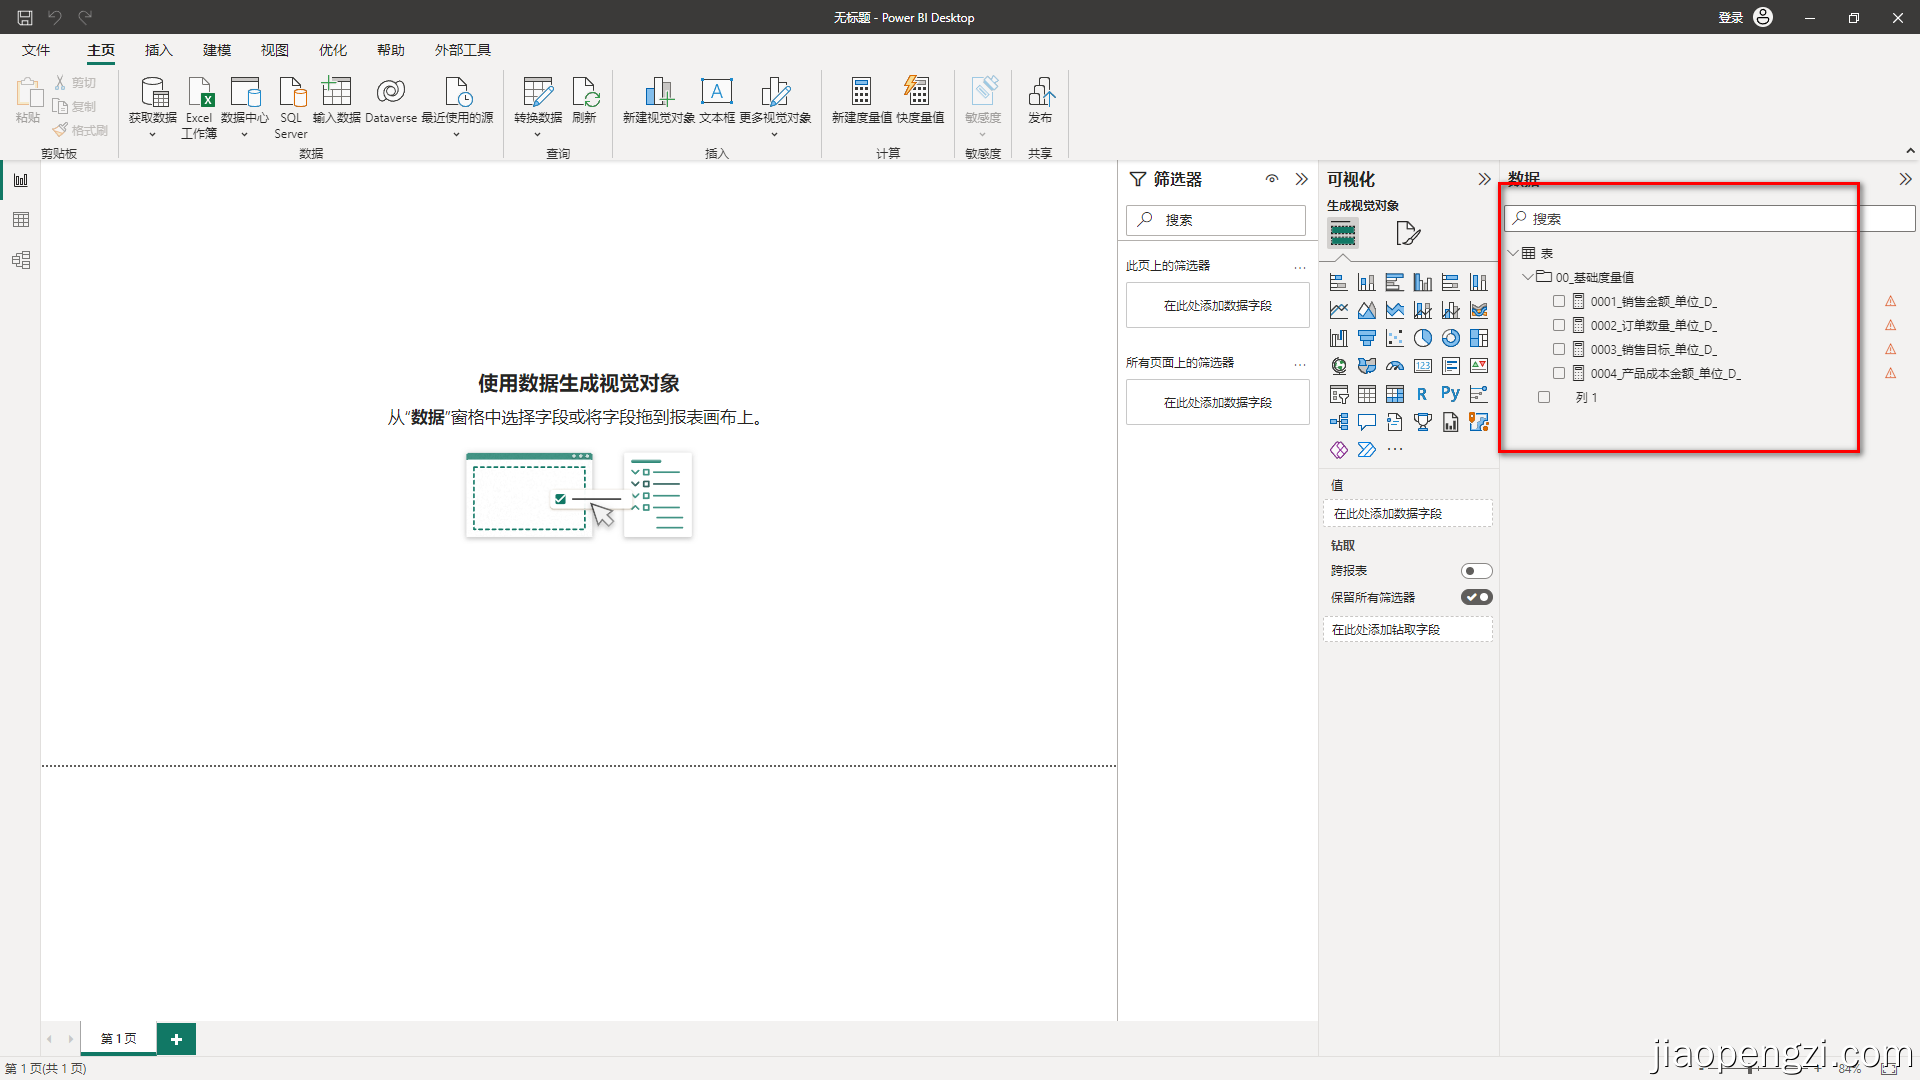
Open B.pbit, you can turn on the computer, and all the measurement values we imported before have come in. In this way, our measurement values from pbixA to pbixB are imported.
We see a yellow exclamation mark, this is because our B.pbix does not have the table in our A.pbix, so before using the import function, we must find out whether these metric values are meaningful after importing.
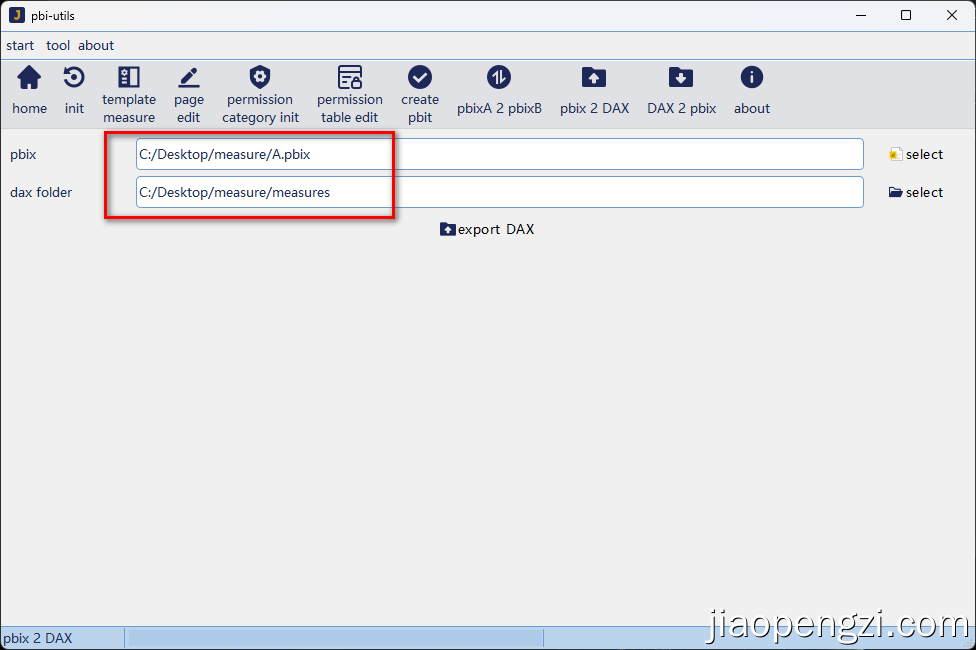
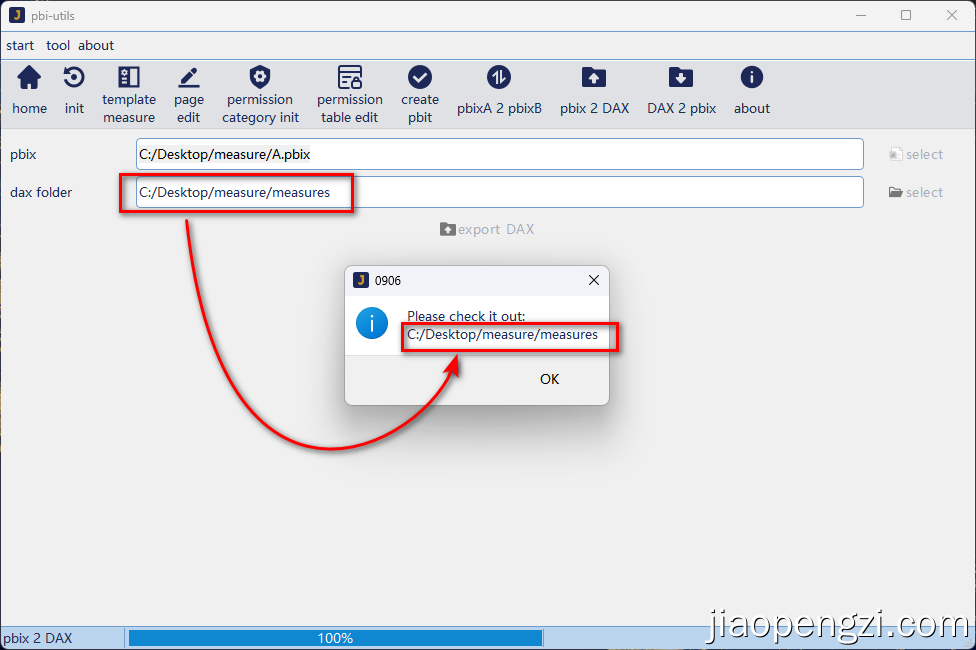
In the pbix 2 DAX page, we select the corresponding pbix file and the corresponding folder; click the button to export DAX.
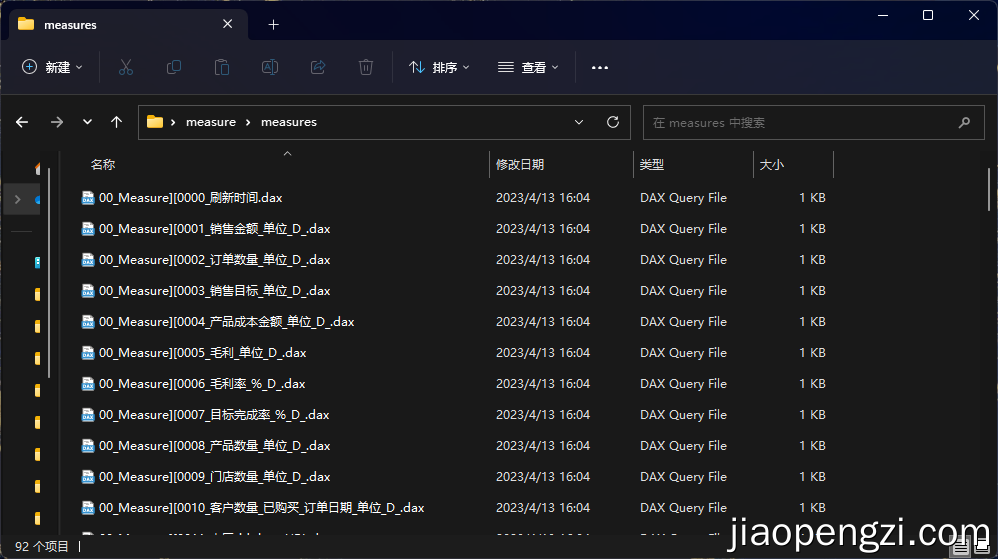
We open the path of the prompt, and we can see the exported measures.
In the exported metric, there is a separator in the name. Before ][the separator is the table that stores the metric, and after the separator is the name of the metric.
In the exported metric value, the first comment is required for subsequent import, please do not delete it at will.
-
@description: The measure description.
-
@displayFolder: The folder where the measure is located.
-
@formatString: The format string for the measure.
-
@dataCategory: The data category of the measure.
DAX 2 pbix and pbix 2 DAX is a reverse process.
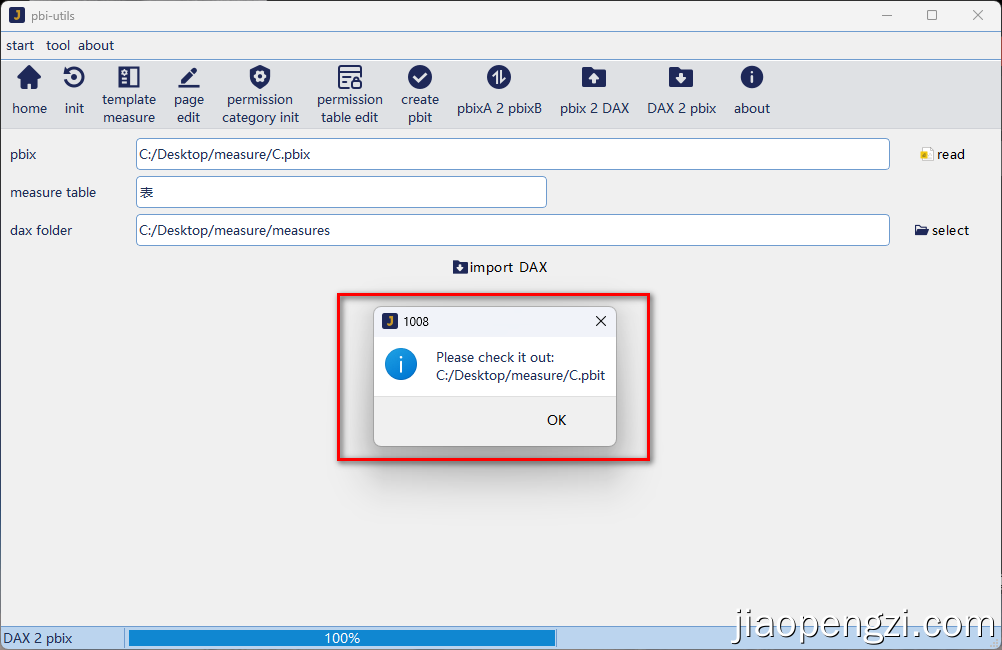
First, you need to read the imported pbix file to get the corresponding measurement value table. After reading, you can select the corresponding measurement value table.
Select the above exported measures folder and click Import DAX.
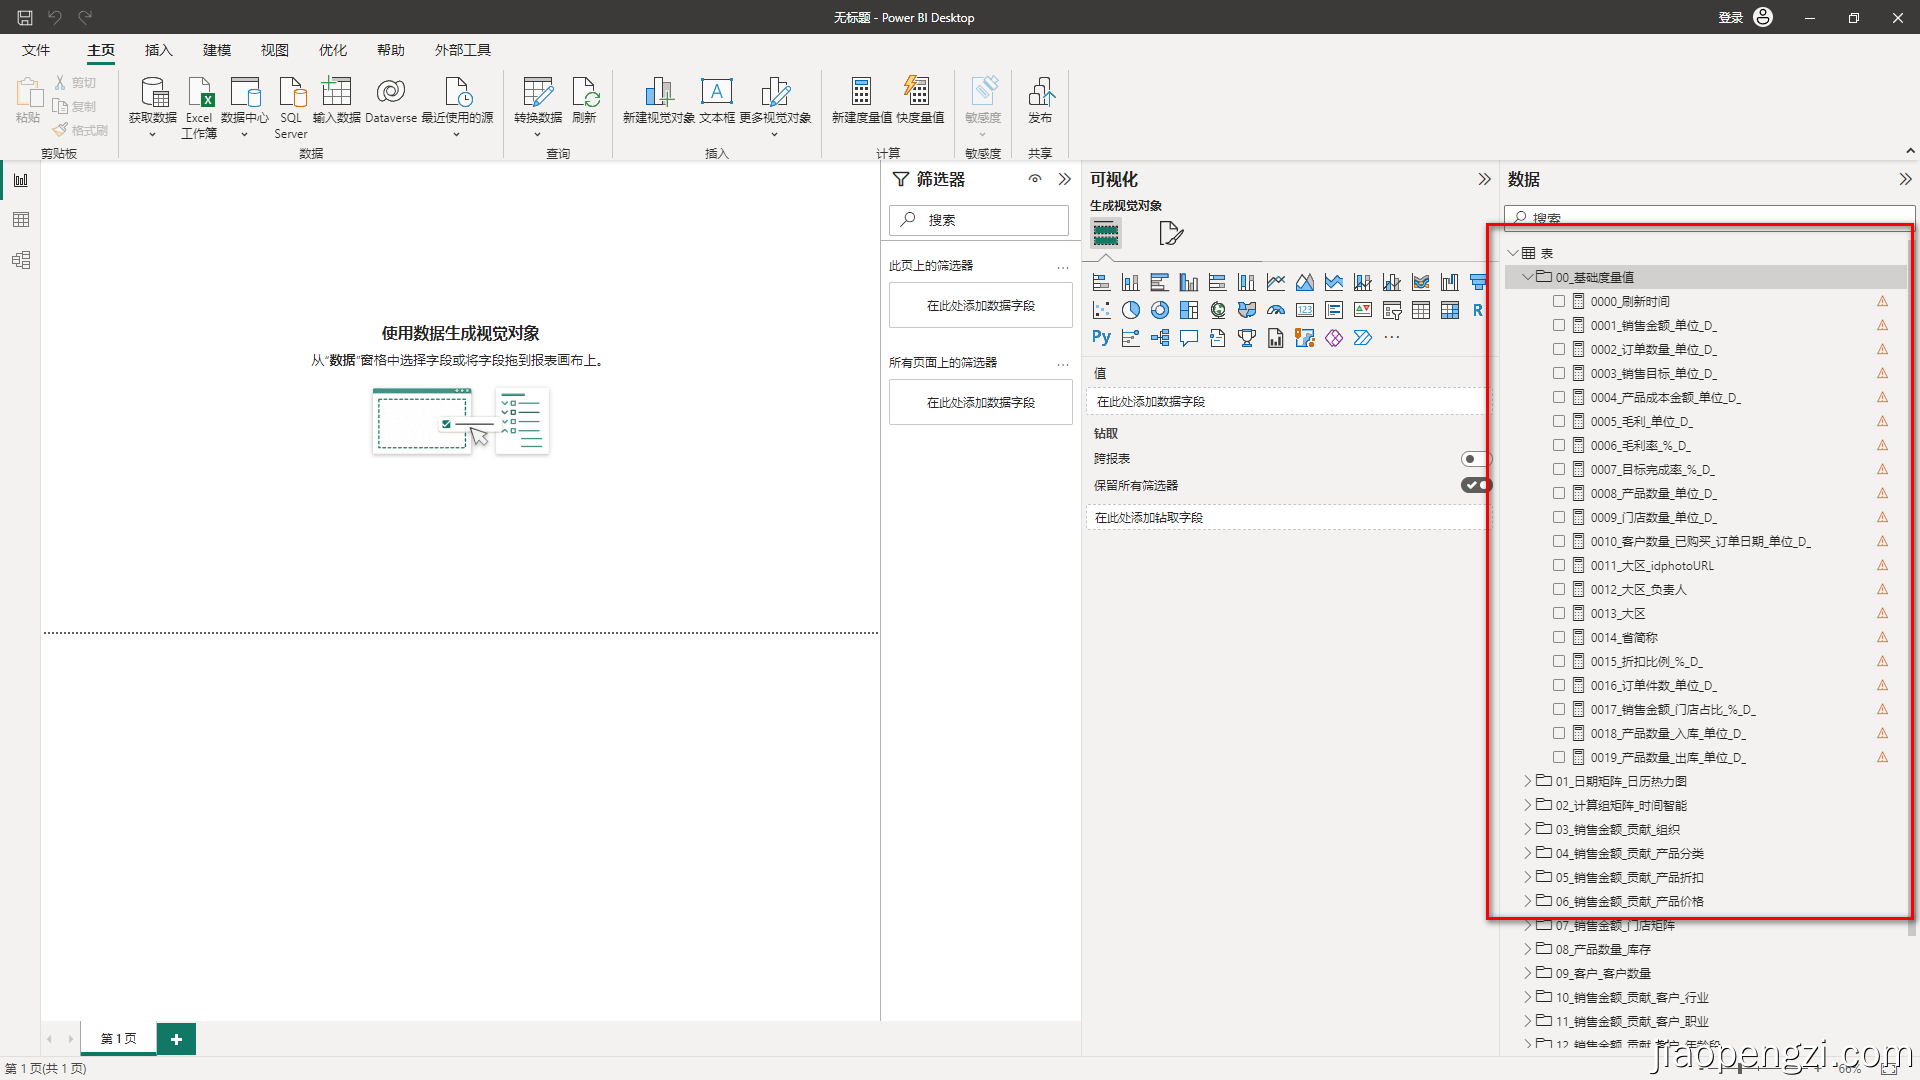
You can see the prompt message, and a C.pbit file is created in the same directory as the C.pbix file we need to import. Open and view, you can see that all the metric values in the folder have been imported. Like the previous pbixA 2 pbixB, we see a yellow exclamation mark. This is because our C.pbix does not have the table in our A.pbix.
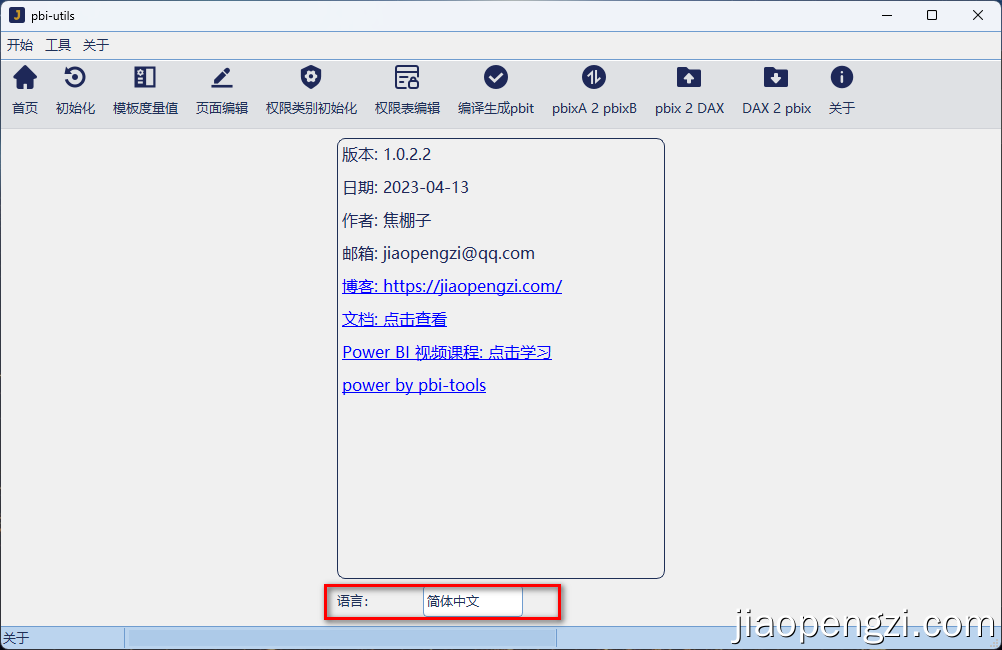
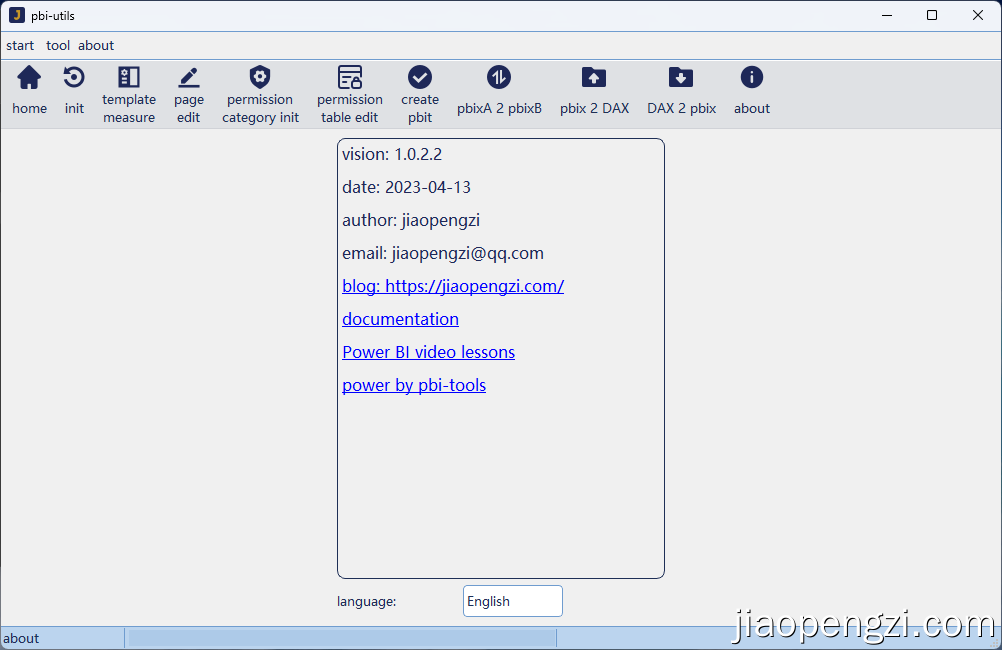
On the about page, there are mainly our contact information, user documentation and our video course recommendation, and we have displayed them in two languages, Chinese and English. You can switch through the language selection below.
Chinese interface display
English version interface display
- When we operate pbix, we do not operate on the original pbix file, which guarantees the security of our original file and will not destroy the original file.
- All the pbit files we generate are Power BI template files, which will not contain data, only the corresponding metadata. After we confirm the use, please save it as pbix in time.
- In the pbit that generates multi-page navigation, you can also modify it according to your own needs to realize personalized pages such as Home, Navigation and NoPermission.
- It is known that some unknowable problems will occur in the pbix files generated by some old versions of Power BI Desktop. Please upgrade to the latest version of Power BI Desktop and save another copy.
