-
Notifications
You must be signed in to change notification settings - Fork 114
User Guide
higan v107 features a brand new tree-based GUI. The goal of this GUI rewrite was to be able to express complex configurations for all 25 (and counting) systems that higan emulates, without compromises that were required in previous releases.
Because this version is a brand-new paradigm, it is highly recommended that you read this user guide before attempting to use v107. It is also important to note that this is a prototype release meant to collect feedback on ways to enhance the discoverability and usability of the software.
This is beta software, and care will be needed to work around issues that still exist with it. The goal will be to release several public point releases along the way that improve the most important issues.
The reason I am releasing this before all issues are resolved is because higan has been stuck in development for 235 WIP releases spanning over two years of development. I need feedback and real-world usage to steer development into a positive direction from where we are now.
If you're not on board for using a beta release cycle, please continue using higan v106 until the new user interface design is completed.
Thank you!
higan runs Game Paks instead of ROM image files. You will need to use the accompanying icarus tool in order to import ROM images into higan-compatible game paks.
Run icarus first. Do not run higan first. If you run higan first, then higan will not see the icarus-generated game paks, and will default to the wrong path. I'll talk about how to handle this case anyway later in this guide.
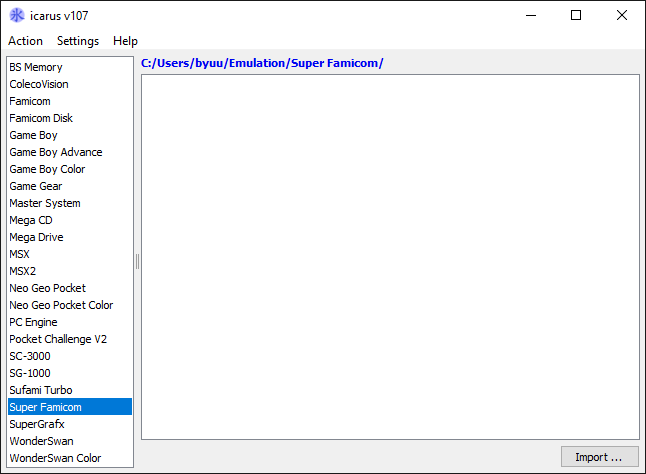
You're initially greeted with a list of all systems that higan currently supports. In this guide, we're going to walk through setup with the SNES (Super Famicom), but the same steps work for all systems.
Choose the system from the left-hand system list, and you will see a blank window on the right. There will not be any game paks on your system from a fresh install, unless you're coming from higan v106 and already have some made.
icarus does not replace your game ROMs: it creates game pak copies from them to the location specified by the blue text at the top right. This is a clickable link that will let you change the destination folder for importing, but for now you won't want to change it.
Instead, hit import at the bottom right to import a new game ROM file.
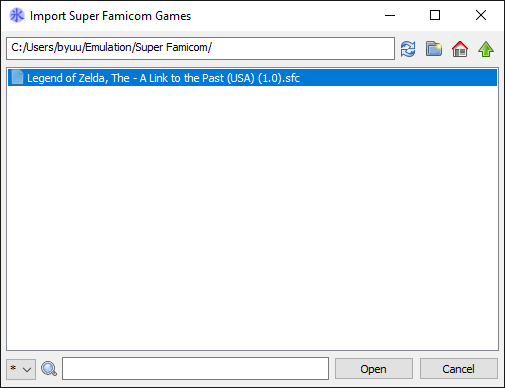
Navigate to where your game ROMs are stored, and from here you can double-click to import games. You can multi-select files here to import many games at once. But in general, the idea is to import the games you want to play, rather than say an entire collection. You can always import more games later on. In any case, it's your choice.
Hit open once your games are selected.
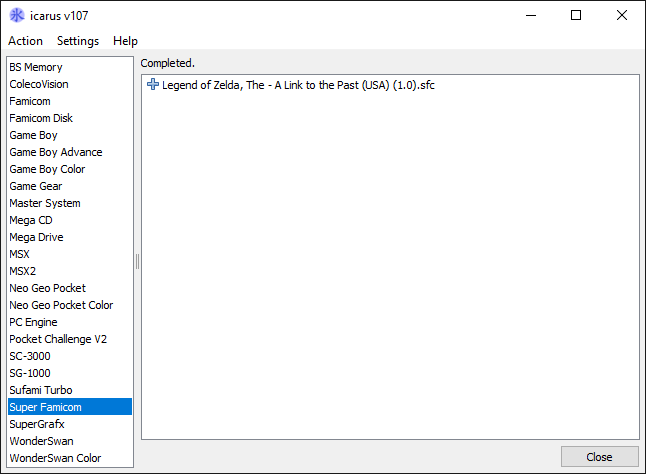
Once you've imported the games, a completion log will be displayed. If the ROM image wasn't recognized as valid, or if firmware was missing, you will be able to see those errors here. Firmware is a bit beyond the scope of this user guide for now, but in general it will tell you what files you need. Obtain those files and place them next to the game ROMs, and then try importing the games again.
Now hit close.
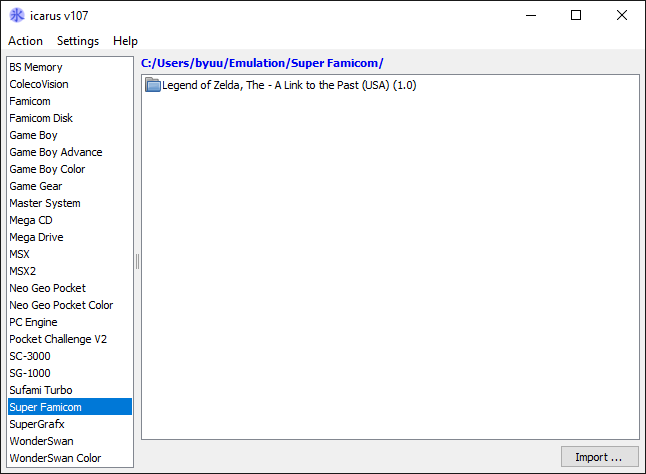
Now you're brought back to the main window where you can see all of the games in your library. From here, you can import games for other systems, or stop.
Note that if you are importing Sega CD images, they need to be in BIN/CUE format presently. Also note that Sega CD emulation is very young.
By running icarus first, games will be imported to the Emulation folder
inside your home directory, which is where higan will try to look for them.
We can now launch higan:
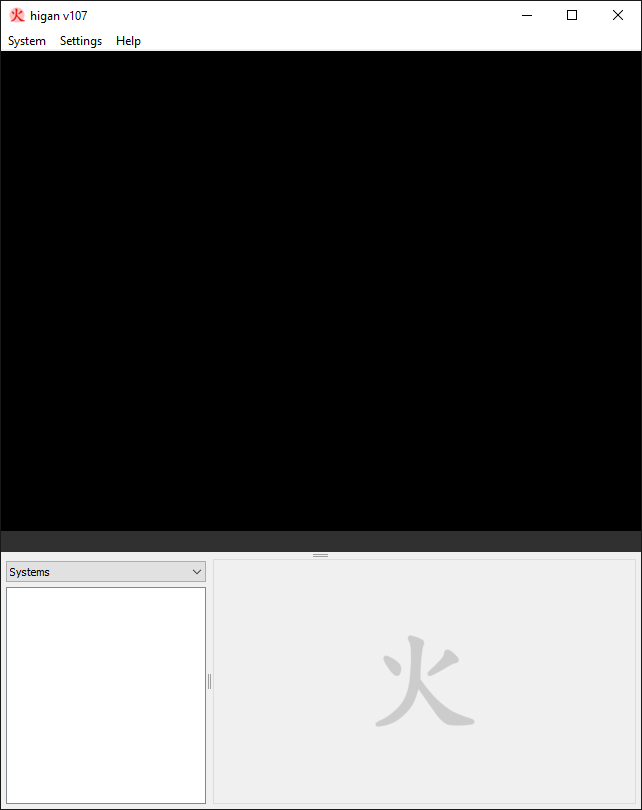
We are initially greeted with a rather empty window. Note that non-beta releases will have systems pre-populated here, but as the point is to gather feedback, I am shipping v107 with a blank slate.
The top-half is the video output region, which contains the menubar at the top and gray statusbar at the bottom.
The bottom-half is the system panels region.
Let's start first by configuring drivers and hotkeys:
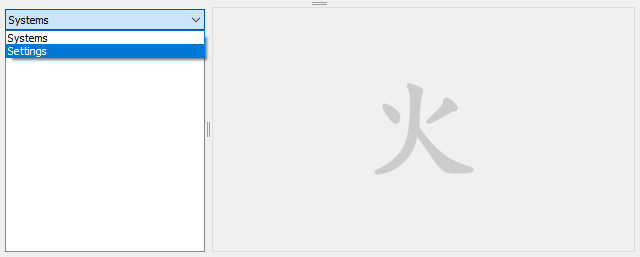
By opening the drop-down at the top-left of the system panels, you can change to the settings panels.
First, there's a slight issue on Windows with mouse capture using the new
multi-monitor support, so to fix that, choose Video on the left and then
check the Exclusive box, like so:
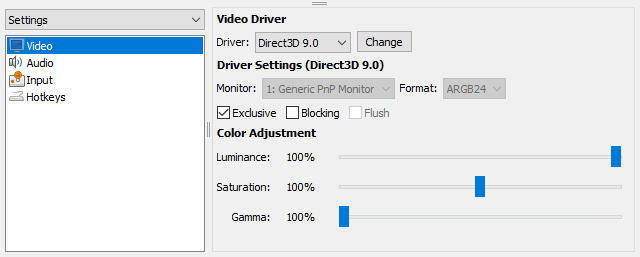
There's another slight glitch with the GUI on Windows where sometimes the GUI widgets won't be placed correctly and will overlap each other. Simply change the item selected on the left away and back (eg Video → Audio → Video) to correct this.
You'll likely want to configure audio as well:
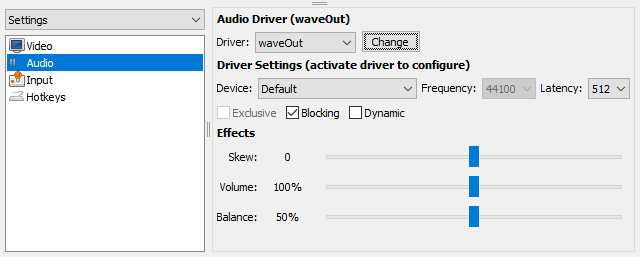
And again because this is a beta, there are no hotkey assignments set out of the box, so do that now:
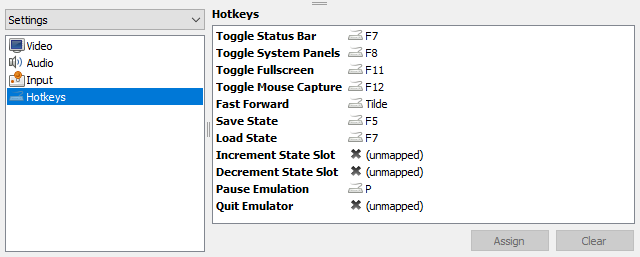
While setting up your hotkeys, note that no hotkeys will fire while the hotkeys panel is open. This is so that you can eg map the fullscreen toggle without actually toggling fullscreen.
There's another bug where hotkeys will still not fire if you hide the system
panels from the menu, so once hotkeys are mapped, be sure to choose a different
setting option on the left, or switch back to Systems in the top-left
dropdown menu.
Now that the higan base setup is complete, we can start creating systems and then playing games.
From the top-left of the higan main window, choose System → Create to begin
creating a new system. This will switch your panel dropdown to Systems and
present you with a list of supported systems on the right:
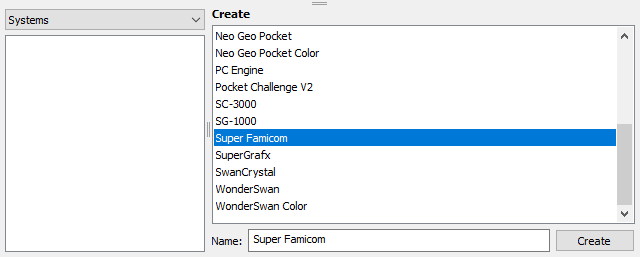
Choose the system you want, and you will see a name box appear at the bottom right. You can name the system anything you want. The reason for the naming here is because you can have multiple instances of the same system. So it's easy to have different entries for NTSC vs PAL machines, or for a Famicom with the Famicom Disk System attached to it, or for a Super Famicom with a Super Game Boy attached to it.
These system profiles remember all of their settings, so however you configure them and whatever cartridges and controllers you connect, they'll be remembered the next time you run higan (barring any bugs.)
Now hit create, and the system will appear on the left:
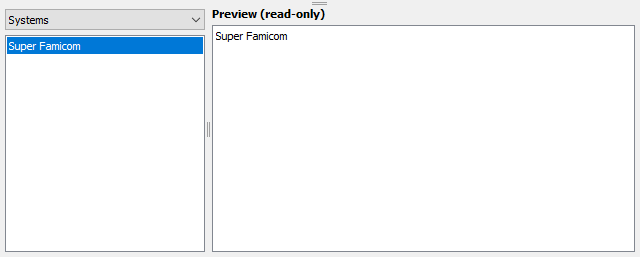
Double-click on a system on the left to launch it. You will see the menubar
change to indicate the currently active system. You can always select the system
name from the menubar and choose Unload to go back to the system selection
and creation screen you were at previously.
Now that we're in an active system profile, connect a cartridge that was
previously imported by choosing the Cartridge Port option from the list at
the bottom left:
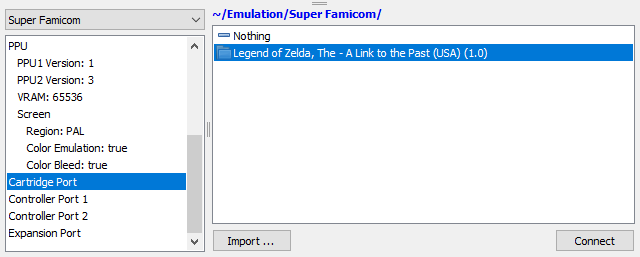
Double-click a game from this list to connect the cartridge to the system. You
will see the list change to show the connected cart afterward. You can go back
to Cartridge Port again to change the cartridge, or to disconnect it.
Note that most systems require a connected cartridge in order to boot, and presently due to a lack of safeguards, bad things might happen if you try to power on the system without a cartridge connected, so please be careful.
Now remember before how I said to run icarus first? The reason is because if you don't, this will happen:
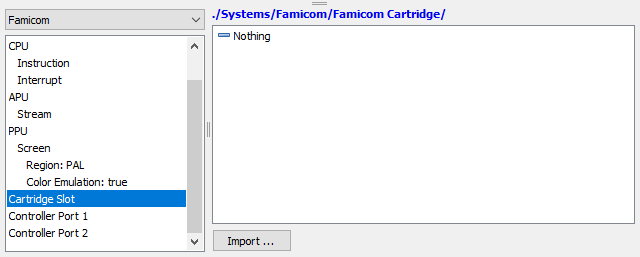
What you'll notice here is the path is set to "./Systems/Famicom/Famicom Cartridge/" instead of the desired "~/Emulation/Famicom" where icarus will import games to.
This is because higan on first launch of a new system tries to see if icarus already imported games to the common game pak location of "~/Emulation" (eg the Emulation folder in your home directory.) If it can't find it, it will default to the location where settings are stored for the system profile you just created and named.
icarus doesn't know about individual higan system profiles, since it's a separate tool that runs on its own.
higan doesn't just always default to the Emulation home folders because the new design does not make a distinction between cartridges, CD-ROMs, floppy disks, controllers, keyboards, and any other peripherals: they're all folders that hold their memory and state inside of them. It wouldn't make sense for an individual system profile to store gamepad configuration data inside the shared Emulation folder for game paks, so it falls back on the system configuration folder when you run higan before icarus.
If you reach this point anyway, click on the blue text at the top-right to open a path change dialog window, and you can navigate to select the appropriate Emulation folder instead for your current system.
Now let's create a gamepad by going to Controller Port 1 and selecting
Gamepad on the right:
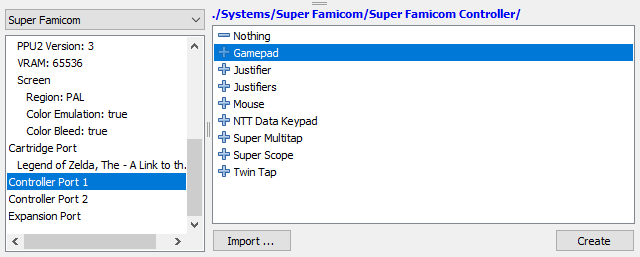
(note how the path this time defaults to being inside the system profile you created, as discussed above.)
Double-click on the entry and you'll get a window to assign a name for the gamepad:

The default name will be the name of the device, in this case Gamepad, but
you'll need to have unique names for each controller port, so I recommend
changing the name to Gamepad #1 here and then clicking on Create.
The idea here is we are treating gamepads like physical objects: you can make as many gamepads as you want, and you can configure their mappings however you like. Let's say you then add a Super Multitap 4-player adapter, you can connect your controller right to the multitap. Or your Twin Tap. Or another Multitap, which you can do recursively as many times as you like (not that you should, but you could.)
A Super Multitap with four Twin Taps connected to it may be an odd edge case for one specific game, but that's the kind of thing I'm trying to support with higan, and it's something that's previously not been possible with emulators that hard-code Super Multitap emulation as four gamepads.
Back to the setup: choose your new gamepad that has now appeared in the system tree on the left, and assign mappings to it:
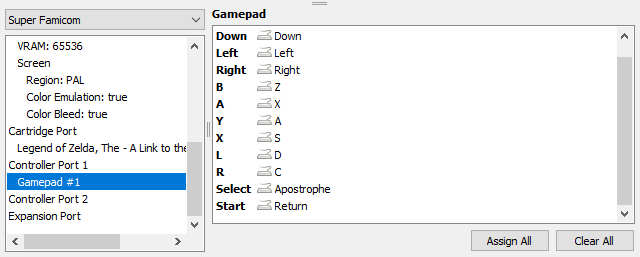
It's easiest to hit Assign All at the bottom right and map all inputs at
once, but you can also double-click individual entries to map them one at a time
if you prefer.
Finally, you might want to resize the window or change some other settings, so
go to the menubar and choose Settings:
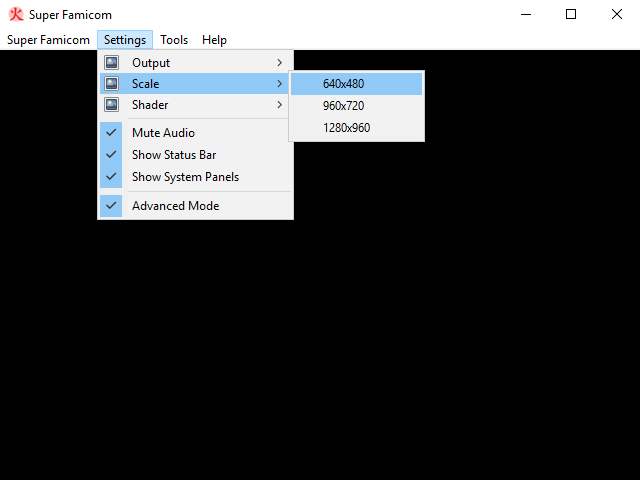
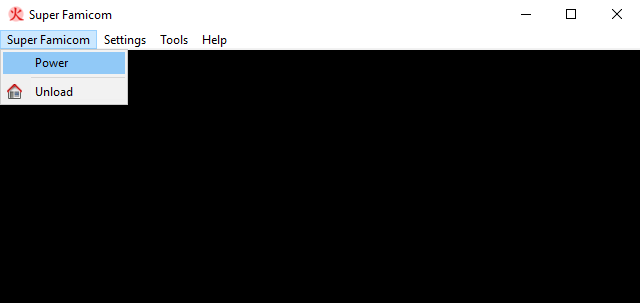
At this point, the setup is finally completed and we can start running games. Choose Super Famicom → Power to begin playing the connected game pak:
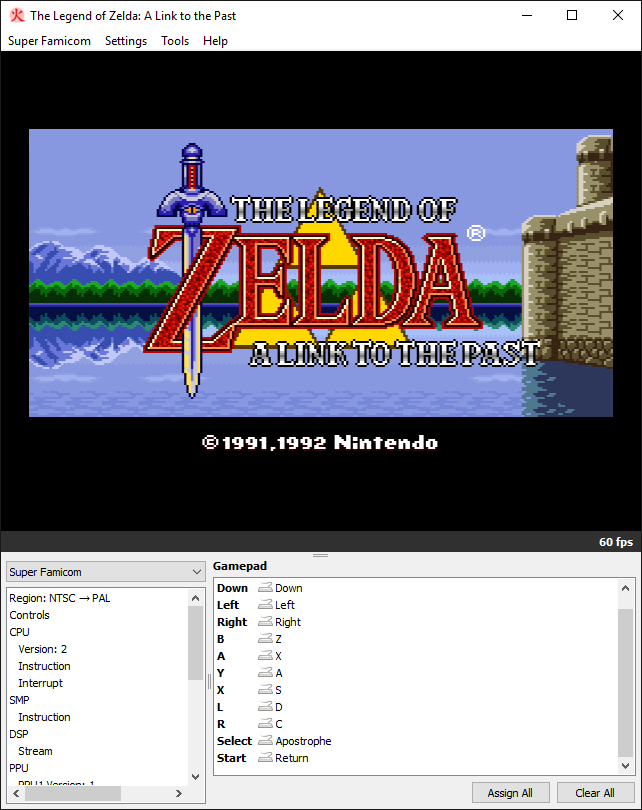
And with that, we finally have a game running and playable:
If you'd like to hide the panels while playing, you can do so from the Settings
menu by unchecking Show System Panels, or by using the hotkey mappigng to
toggle them on and off.
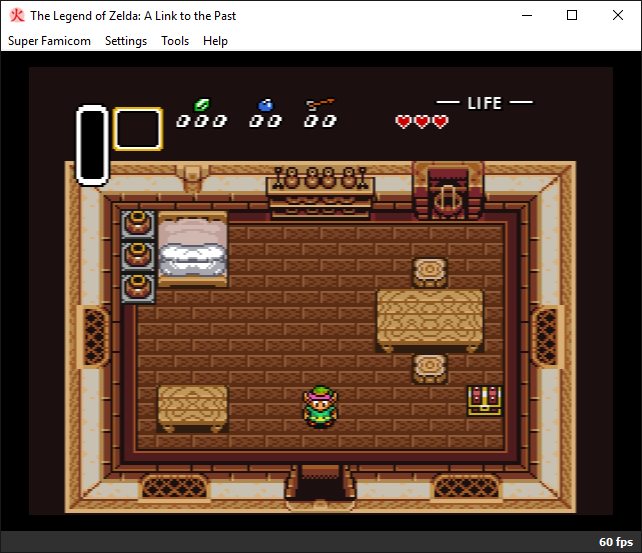
Note that you will need to turn the panels back again in order to change games, systems, settings, etc. But while playing you can hide it at least.
As a last point, the system trees tend to be rather complete, offering rarely
used functionality such as setting the CPU revision. My initial design idea was
to have the Advanced Mode checkbox in the Settings menu toggle the less
commonly used options, but in practice this didn't work out well, as sometimes
common nodes would appear as leaves inside parent branches that were not common.
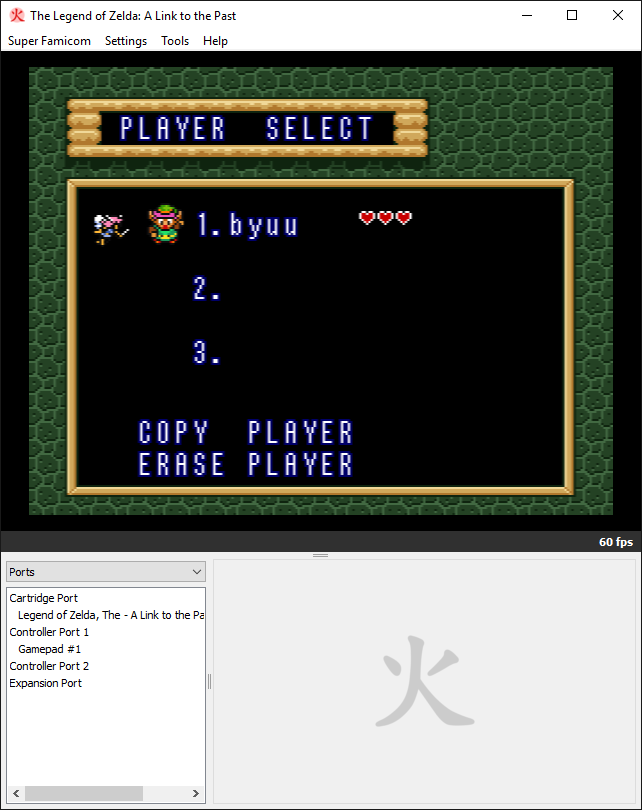
So instead, I'm moving toward having filters in the panel dropdown at the
top-left. Choose this and you can select Ports to see only peripheral slots
for things such as cartridges and controllers:
There's also an Events filter which is used for creating debugging trace
logs of CPU instructions and interrupts (and in the future, even more events.)
But that's beyond the scope of this user guide.
Look, I know this is complicated. I know this is unorthodox. I hear you. I've been using it too, I know. But I need to support esoteric configurations.
The MSX with its two cartridge ports (one used for hardware expansions), two floppy disk drives, and a cassette tape drive isn't going to work well with a "File → Load ROM" menu option.
The Genesis with Sonic 3 connected to Sonic & Knuckles connected to a Game Genie isn't going to work that way either.
You're not going to want to load the Sega CD and Famicom Disk System BIOSes every time you want to play a game for those systems, and trying to make manual BIOS selection screens isn't going to work for a generic GUI that is meant to emulate dozens of systems at the same time.
Not having the ability to spawn multiple controllers that exist as their own separate folders inside your system profiles means you can't emulate having multiple Super Turbo Files, which act like PlayStation memory cards but for the SNES.
The esoteric edge cases of dozens of systems all stack and result in a GUI that is a bit more involved to set up.
But so far, this is about the best I can come up with for having all the expressive power I need with no compromises.
I've tried a dozen iterations of expressing a tree view, and so far, the panel system shown above is the best I've come up with.
Thus, I'm releasing v107 now, before it's complete, because I want to hear from you. How can I make this easier and more intuitive to use? Let me know your thoughts on the feedback page, please.
higan v107 is not the end, it is only the very beginning. Please be patient and try not to form long-lasting impressions based on it. With everyone's help, and copious amounts of time, things will improve. We'll figure this out, and we'll make something amazing together.
Thank you so much! ^-^