-
Notifications
You must be signed in to change notification settings - Fork 145
How the bookmarks work
Bookmarks (sometimes also referred to as markers) have been introduced to allow quick tuning of predefined frequencies, and as a way to allow users to qickly identify transmissions without the need to be familiar with the receiver's location and HF circumstances.

They're the little colored "bubbles" that show up above the frequency bar on the top. They can come from three different sources, which correspond to the color of the bookmark:
-
Bandplan frequencies (FT8 & co) in green, common amongst all users. Some specific modes have been tied in to specific frequencies, these are kept in the bandplan (
bands.json) and are subject to little changes over time. The bandplan can be modified by the receiver operator. -
Server-side bookmarks in yellow, common amongst all users. These are the classic bookmarks where you'd put your repeaters and radio stations. They are kept in a file named
bookmarks.jsonwhich can be modified by the receiver operator. -
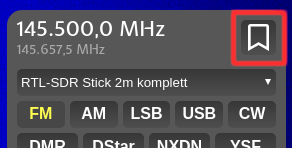
Client-side bookmarks in light blue, local to the current user. These bookmarks can be created using the bookmark button on the receiver panel and are stored in the browser's localstorage. They are not sent back to the receiver, and cannot be shared with other users.


When you first start the receiver, you may see some unrelated and strange bookmarks already in there. Those are the ones I collected on my development receiver, consider them examples. Of course you can replace them.
The only way to have bookmarks that automatically enable the corresponding digimode decoder is by entering them into the bandplan, there's no support for those modes in the other sources. This is due to separate archictectures, and will be changed in the future.
The location of each of the files mentioned varies with the type of setup. In most cases, they should be kept in /etc/openwebrx/. If you have setup your receiver from source, the files will be located in the checkout folder, but it is recommended that you copy them over to /etc/openwebrx/ and maintain your changes there. You will probably need to create the directory initially.
If you are running OpenWebRX inside a docker container, the file will be kept in /etc/openwebrx/ as well, but that is in the container's filesystem. In order to maintain this file, you can mount a volume or directory into this location and then edit the files there. The docker container will copy its initial files to that location if it doesn't find anything on startup.
-
Directory mount:
-v /my/local/directory:/etc/openwebrx- you will find the files in/my/local/directoryafter the first run. For consistency, you can use-f /etc/openwebrx:/etc/openwebrx- that way your files will be in/etc/openwebrxon the host and inside the container. You will probably need to create the local directory first. -
Volume mount:
-v openwebrx-config:/etc/openwebrx- you can find out where the files are stored on your local filesystem by runningdocker volume inspect openwebrx-config, they are usually under/var/lib/docker/volumes/openwebrx-config/_data. You will probably need to create the volume beforehand:docker volume create openwebrx-config
Please be very careful when editing the files. The json format is pretty sensitive to missing quotations, commas and other syntax errors. There is no partial parsing, so the if there's an error in any of the files, you will not have any bookmarks at all.
You can use online syntax validators like JSONLint to validate the syntax.
Please do not recommend other file formats to the authors. This is an intermediate solution until a frontend to edit the information contained in these files has been built.
Supported Hardware
Setup Guide
Docker
Manual installation
Upgrading an installation
Migrating to OpenWebRX 1.0
RHEL specific notes
User Management
Configuration
Bookmarks
Background decoding
How to get openwebrx stats into collectd
Airspy HF+ and Discovery
Airspy R2 / Mini
HackRF
Perseus HF receiver
RTL-SDR
Radioberry
SDRPlay
HPSDR / Hermes-Lite 2
FiFi-SDR
AMBE vocoder